How accessible is air travel, and what — as a travel advisor — should you know about the flight experience for travelers with disabilities?
Disabilities affect 27% of the adult population in the U.S., so it is important for every advisor to have a basic understanding of the market. In this article, I will break down the steps in booking and taking a flight for those with mobility disabilities. This includes wheelchair users, those who use assisted walkers (such as canes, walkers, rollators or knee scooters), those with prosthetics and those who are unable to stand or walk for long periods of time.
Questions to Ask Travelers During the Initial Consultation
You may be surprised to hear that air travel is not governed by the Americans with Disabilities Act (ADA). While the ADA covers American airports and terminals, it does not govern accessibility in air. Instead, that is governed by the Air Carrier’s Access Act (ACAA) of 1986. All flights originating or landing on U.S. soil are required to comply, including foreign and domestic airlines.
Unfortunately, most people aren’t even aware of the existence of the ACAA, let alone understand its impact on those living with disabilities. So, it falls on savvy travel advisors to educate clients about this important legislation, and the rights that those with disabilities have.
In an initial consult with clients, be sure to ask if they have any mobility needs. If they answer affirmatively, you’ll need additional information. (Note: you should never ask what their specific disability is, only ask how it can be accommodated.)
I recommend asking the following questions:
- Do you use a mobility device, and what kind?
- Are you ambulatory or non-ambulatory?
- Do you need assistance reaching the airport gate?
- Do you need assistance getting on the plane?
- What are the dimensions of your device when prepared for storage?
- What is the weight of your device?
- Does your device have a battery? If so, what kind, and what voltage? Is it removable from the device? (Airlines have strict regulations.)
- Do you require assistance to your seat? Are you able to self-transfer into the seat, or do you require a full carry?
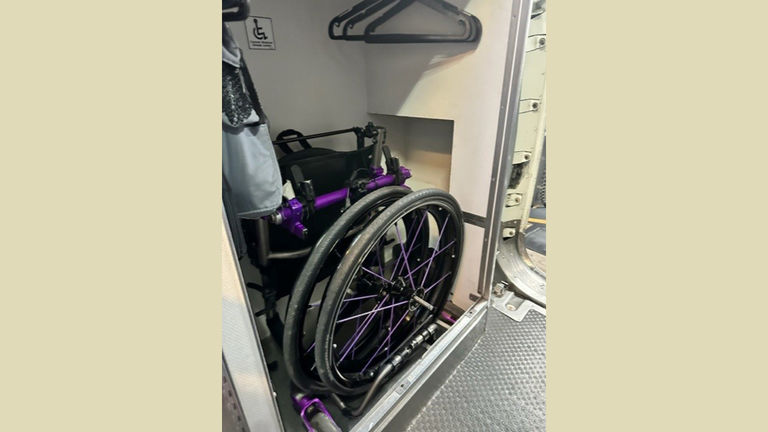
 Wheelchairs can sometimes be stored in the first-class cabin.
Credit: 2024 Kristy DursoDuring the Flight-Booking Process
Once you have the answers to these questions, you’re ready to begin the flight-booking process. It is critically important to confirm that the mobility device can fit on the type of aircraft booked, and that the aircraft can accommodate the device’s battery. The Federal Aviation Administration offers more information on what types of batteries can be accommodated. Due to potential logistical challenges, never book anything shorter than a two-hour layover for those with mobility disabilities. For layovers where customs must be cleared, I recommend four hours.
Once you’ve booked your client’s flight, the next step is to contact the access department for the airline. Clients with disabilities are eligible for seating accommodations for themselves and one companion. If a larger party is traveling, the clients should be prepared to pay for seating for additional family members.
This can be slightly problematic when booking for families with young children when one of the parents has a disability, so be sure to prepare your clients ahead of time. As a wheelchair user, I personally prefer the bulkhead seats for multiple reasons: These seats are in the front of the aircraft, so I don’t have to be pulled as far down the plane, and there is more room for me to move my legs to prevent swelling.
However, there’s one caveat: Bulkhead seating often has stationary armrests, so the client needs to be able to transfer over them. If they require a full lift, it would be better to put them in a different row. While on the call with the access department, you should expect to give the agent the dimensions and weight of the mobility device. If the client is traveling with anything other than a power chair, you should request that the device is stored in the cabin. If the client cannot walk, be sure to request an aisle chair to get on and off the aircraft.
The ACAA has specific language that allows those using medical equipment to store it in the cabin, as long as it can be done safely.
There are three areas on an aircraft where a mobility device can be stored:
- The closet in the front of the aircraft (or other designated stowage area): These are primarily designed for collapsible or folding manual chairs, so they will not fit every manual chair. (Most permanent wheelchair users prefer a rigid frame chair, which does not break down as small. However, my previous chair — 23” long, 19” tall and 19” wide when broken down — could be accommodated in most American Airlines closets, and some Delta Air Lines and United Airlines closets.)
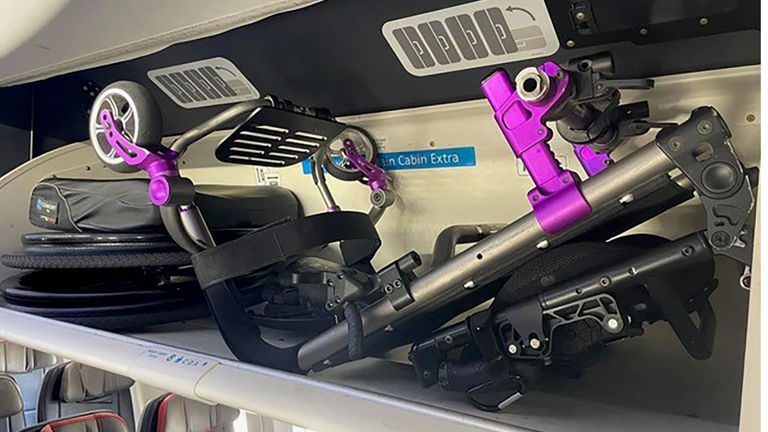
- The overhead bins: A chair with the same dimensions as mine (or smaller) can also fit in the newer overhead bins where roller carry-ons can fit on their side.
- Strapped to a seat: If the aircraft can seat 100 passengers or more, and it does not have a closet, the manual wheelchair must be seat-strapped. This requires two seats, and many airlines require the full row to be empty. (If the aircraft has a closet, seat-strapping is not required by the airline.)
Advise that clients travel with a transfer sling. While this is not a requirement, it makes transferring much easier and safer. I recommend the Adapts portable transfer sling You can see a video of how it can be used on my Instagram, @kristygoes.
If a client is traveling with a power chair, have them print out instructions for handling their chair and tape them onto the device. They can use plastic sheet protectors to put it in, then secure one copy to the front and one to the back. The instructions should include how to lock and unlock the wheels, how to recline (if applicable) and important safety notes (for example, some power chairs cannot be placed on their sides; they must be stored in an upright position). Advise your client to also bring a roll of bubble wrap: When they are preparing their chair for storage, I recommend wrapping as much of the chair up as possible.
 A mobility device may be stored in an aircraft's overhead bin.
Credit: 2024 Kristy DursoPreparing for TSA and Airport Security With TSA Cares
After confirming seat and wheelchair accommodations with the access department, you should then register your client for TSA Cares.
This is a special program that trains Transportation Security Administration (TSA) personnel on disability etiquette and assists those with disabilities through the screening process. I highly recommend that those who are full-time wheelchair users have TSA PreCheck or Global Entry. Using TSA Cares will ensure that the passenger gets through everything smoothly, and that TSA will be ready to assist if something goes wrong.
Navigating Departure Day: The Airport and Boarding Process
Prior to heading to the airport, your client should get pictures of their device, with the current date, from every angle. Once they arrive at the airport, they should go to the check-in counter, even if they did online check-in. When talking to the ticketing agent, the client should remind them of their accommodations, including where their device will be stored.
If your client needs assistance through the airport, they will be directed to a waiting area until an attendant can assist. If they do not need assistance through the airport, they can proceed to TSA. Here, they will meet their TSA Cares agent, who will be with them through the entire screening process. (Pro tip: Those with a medical need for liquids are able to bring those liquids through, including water. The liquids will go through a special security screening.)
When the client reaches the gate, they should check in with the gate agent to make sure all the accommodations required have been relayed to this person. This is critically important for aisle-chair users in particular. Also, those requesting storage in the cabin for their assistive devices need to keep in mind that space is first-come, first-serve. If there is another wheelchair user on the flight who requested the space first, they will be prioritized. If the gate agent or crew states that the wheelchair cannot be accommodated in the cabin before checking to see if it fits, the passenger may need to show them the regulation that allows the device in the cabin.
Once it’s time to board, passengers with disabilities will be the first to load. The ACAA gives wheelchair users the right to a dignified boarding; they have the right to board the plane before any other passengers. Some passengers may choose to waive this right, and may request to board last.
Once the client rolls their personal chair down the jetway, it’s time to prep it for travel. Many wheelchair users choose to sit on their custom cushions during the flight. If your client chooses not to, they need to be sure it is stowed in such a way that it will not be punctured by another person’s luggage. Bubble wrap any fragile parts, and take off anything that can come off. (I also use carabiners to clip my backrest to the frame so there’s no chance of it popping open.) Be thorough — it may take some time to prep the chair, but that time is inconsequential compared to the inconvenience of a broken chair.
For a manual chair going in the cabin, this means either collapsing or breaking down the chair. I recommend a bicycle wheel bag for the large wheels; this can typically fit in any overhead bin, or in the closet.
Once boarded, the passenger should be given a separate safety briefing that goes over how they will be assisted off the aircraft in case of an emergency. Note that while this is required by law, it is rarely actually given. The passenger should also let the flight attendants know if they will require the onboard aisle chair to use the lavatory. I highly recommend that any passenger with any struggles with urinary incontinence wears protective clothing.
(I have personally experienced circumstances where it took more than 20 minutes for the flight attendants to come with the aisle chair; another time, the flight attendants could not operate the aisle chair. This is another reason why I strongly recommend that clients have a personal transfer sling.)
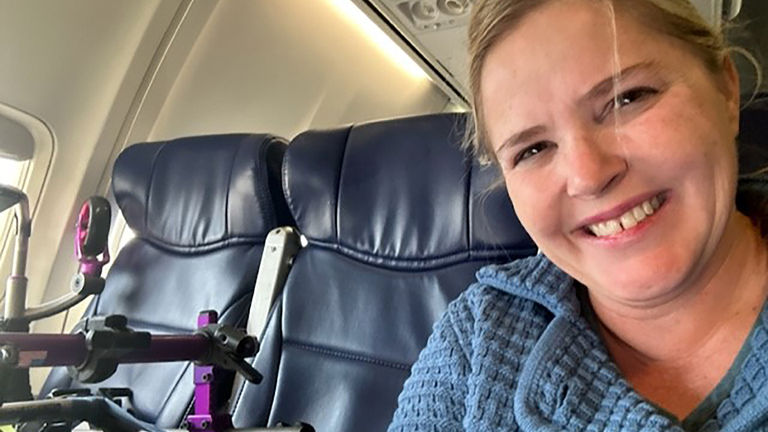
 The writer flies with her mobility device
Credit: 2024 Kristy DursoDisembarking the Aircraft
Once the flight has landed, your client should expect to be the last passenger off. It is critically important that they remain in their seat until their mobility device has been placed in the jetway. Aisle chairs are incredibly uncomfortable, and should only be used for transferring, not sitting. It is the right of the passenger to remain on the plane until their mobility equipment is brought to the aircraft door.
Before transferring from the aisle chair to their personal chair, the client should carefully inspect it for damage. Any scratches, dents, fabric damage or broken pieces should be reported immediately. It doesn’t matter how small the damage appears — file a claim. Think about car seats: If consumers have been in even a mild accident, the manufacturers instruct them to replace it; it’s impossible to tell from looking at it whether the integrity has been compromised. It may be inconvenient and time-consuming, but it is important to report any damage to a personal chair before leaving the airport.
Once your client has inspected their chair, the support team will ask if your client needs assistance to baggage claim. If your client must clear customs, I recommend they accept the help, even if they think they don't need it.
Lastly, I recommend you give every client with disabilities a copy of the Airline Passengers with Disabilities Bill of Rights.
Being an informed passenger makes all the difference.